backcover

MODULE SEVEN: FINAL PROJECT

Reading & Writing:

backcover

Finishing out the last chapter was bittersweet – while the context didn’t greatly affect the outcome of this last module, it did frame what the future holds for creatives once a project is done.

Networking is a hard one for me and while I’ve been able to create many opportunities by getting out there and speaking to the right person, at the right time, at the right event, it doesn’t make it any easier to get off of the couch and actually get out there to talk to people. I really liked how the author was able to demonstrate first-hand how these interactions can play a role in the shape that a project takes by pointing out the illustration that she was able to get by getting up the courage to get the attention of an illustrator that she really admired.

Overall, I loved this book’s “you-can-do-it” attitude. If I was feeling uninspired heading into a Module, reading this book was enough to make me think that it wasn’t as far out of my reach as it seemed. I know that this text will be a go-to for a long time to come.

Research to Inform:

  • I included this because I really love Saul Bass’s work, and he’s basically a legend. That’s about it.
  • When I first started thinking about what kind of project I was going to do, I was thinking that I would revisit stop animation. I feel like it was a more popular medium when I was growing up in the late 80’s/early 90’s and just wanted to share one of my favorites here.
  • I included this one because of its strong Saul Bass influence, but also because I love the way the music matches the visual beats so perfectly.


Original Creation:

Let me start by showing you the inspiration for my project:

CascadesPoster

In a design class last semester, I had to create a movie poster for a fictional movie and thought that it would be fun to create a trailer for the same fictional movie. This wasn’t the first idea that I had…I started with a stop-motion idea and became overwhelmed…storyboarded an entire music video and realized that there just wasn’t enough time to accommodate the schedules of the people I wanted to feature in it.

This trailer wasn’t any less of a challenge, but was at the least, within the realm of possibility for such a short project. Just as a breakdown, I animated the ‘Melt Show Media’ logo and while it isn’t complicated I believe it is effective. I used one of the advanced tutorials for the ‘Dawson Road Productions’ clip and used some other online tutorials for the tagline animations. All of that plus the video effects were done in After Effects. I then used Premiere Pro to sew it all together and edit the audio. The scene right before the man leaves the house was a personal homage to Edgar Wright and his quick-cut sequences in Sean of the Dead & Hot Fuzz. I tried this with the zoom effect he uses in conjunction with the quick-cuts as well and it was a mess so I re-shot it.

The video is just meant to be campy, and not taken seriously at all…and you wouldn’t believe the number of people I showed this to whole thought it was meant to be a very serious type of video.

I’d really like to do some more of this type of video work in the future – this is the first time I’ve ever shot and edited anything of my own and think that with some practice and guidance, my background in photography could translate well into a motion medium. This was a lot of fun, and hope you all find something in it that you can enjoy.

Image result for animate

MODULE 6: UI ANIMATION

READING & WRITING: Chapter 9: Animate! 

Image result for animateWell, this chapter opens up with perhaps the greats analogy ever to describe these overwhelming processes: sometimes you think you’ll be conducting the greatest symphony in the nicest concert hall, but actually find yourself in a dark basement filled to the brim with feral cats tasked with now, trimming all of their nails. Yeah, the process of making this animation was quite like this, but more on that in a later section.

This was a great chapter that felt like it boiled down many of the directions and points that were present in the previous chapters and covered things like, directional movement, sorting your key poses, and hitting you sound marks accurately. While these things were helpful to keep in mind, I felt like the overall chapter was difficult in some ways to transfer over the creative assignment, because creating a UI animation isn’t quite as dynamic as creating an animated story. So I tried to pull apart the takeaways that would be helpful in the creation of the animation, but I think that in the future, I might want to try creating an actual animated short (and I mean REALLY SHORT) in order to feel like all of the readings were applied to a creative process.

Again, aside from that opening chapter that made a devastatingly accurate picture of my personal experience, I do appreciate that the rest of the chapter went back to this familiar, supportive tone that made me feel like I could actually do something like this in the future. And while the book has been great for that this semester, personally, I think I would have benefited from a text that looked at the technical aspects of creation as well.


RESEARCH TO INFORM:

  1. I love the motion of the moon around the plant. Who wouldn’t like to watch that as their app refreshes?

2.  I’m not even sure what this app is meant to track, but the transition between night and day is beautiful and soothing.

3. This on/off switch features a great reverberation between right and left sides when the transition takes place.

4. This UI Design reminded me of the Apple website, which I believe to be one of the best, simplistic yet, visually stunning sites on the web.

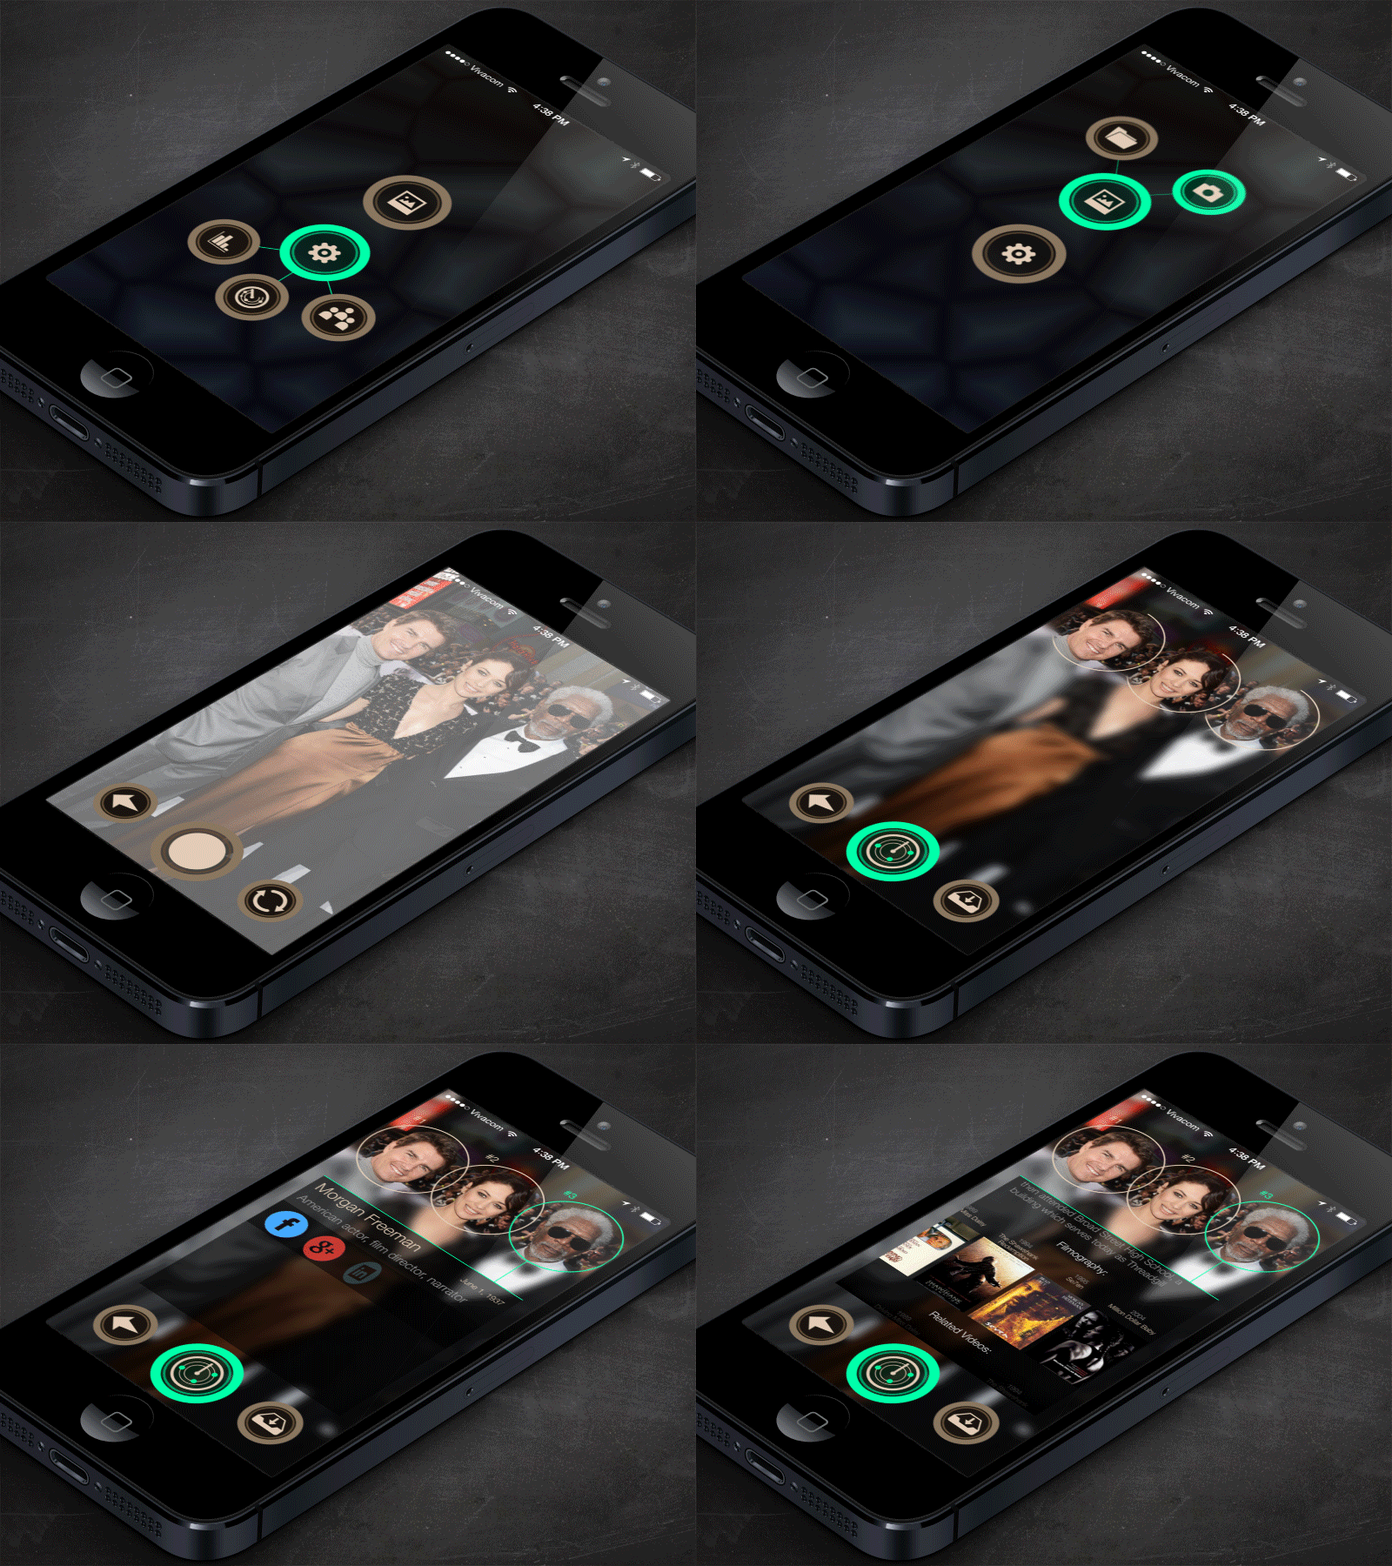
5. The motion that takes place in this face-recognition app is pretty awesome and I can’t take my eyes off of it. I don’t even know if it’s a real thing, but if it is, I need to find it and download it cause it looks like it would be fun to play around with.

6. With the winter we have had, the site of even virtual snowfall is depressing. But this design has a really smooth transition

7. I chose this example because we follow a lot of Soccer, and the app that I currently use (Forza) could learn a thing or two about having a clean, friendly interface.

8. Basically, I chose this one because the animation is just mesmerizing. The transitions between devices are seamless


CREATE:

So, here it is:


This was really hard because a lot of the ideas that I had sketched out based on the research were complicated because I was looking at some pretty advanced examples. I have a lot of trouble working with After Effects; after all the work done in it this semester, I don’t feel like I picked up on it as quickly or easily as many other Adobe programs I’ve worked with before. My first couple of attempts were tossed out pretty quickly – the motion and timing was all off.

I decided to go back to something simple that would take the search bar tutorial that was provided, but the change it up a bit. I was at a loss for a subject to search for, but thankfully (I think?), my cat decided that it was time to pay attention to him rather than the computer in front of me.

My favorite bit is probably the spin that goes into the search bar at the very start, and the rest worked out just alright. I think what I need is a proper book that deals with all of the components of the program in detail in order to really expand on my ability to bring my ideas into fruition. I feel like I spend more time fighting with the program to get the visual I imagine seeing on the screen than I do for actually fine-tuning and make something really good. I’d definitely take any and all reading suggestions.

alexey-ruban-103990-unsplash

MODULE 4: STOP MOTION ANIMATION PT.2

Reading and Writing:

Chapter 6:

alexey-ruban-103990-unsplash This chapter dives into the quality that sounds adds when applied to a video or animation. One thing that popped out to me right away was the notion of leading your video with sound. Honestly, when I storyboarded the ideas for my video, I knew that music would be in one of them (and ultimately, the one I went with). But, I didn’t go into that process with music in mind. That was the first creative edit I had to make in order to plan the way in which my animation was going to take shape.

I was also really interested in the way the chapter went into diegetic and non-diegetic sounds. Honestly, I don’t work with sound at all in most creative endeavors, and never realized how literal and non-literal audio are in categories of their own. I went in just kind of think “sound is sound” and really had to re-frame my thinking when choosing how and when to use these two types of audio and the effects that it will have on the project as I move through it.

The rest of the chapter seemed pretty straightforward to me and covered things like sound effects, music scoring for films/videos and the importance of timing. I’m really glad I did the reading before starting any filming because has shaped my thinking about the applications of these qualities as a part of the planning process. **EDIT** Now that I HAVE finished the video, I am even MORE thankful that I read this first. It would likely be a totally different kind of video if I hadn’t.

Chapter 7:

Disney-Movie-Mistakes-Beauty-Beast-Painting-Age.jpgThe one thing I love about this book, is that after reading a chapter like ‘Design Wonderland’, I really feel like I could jump into any type of unexplored creative endeavor with ease. It makes me feel confident, despite having no previous experience creating physical or social laws for a place that doesn’t exist.

But enough about that, I bet you’re wondering why I used an image from Disney’s Beauty  & the Beast here for this section. Well, it’s my earliest recollection of catching an issue with continuity, and it made me angry. If the Beast had been cursed for however many years, there is no way that his portrait would look the same then as he did in ‘real life’ when the curse is broken. This chapter touches on the importance of sticking to the rules that you create for yourself because no one wants to be caught out of line in their own made-up world.

I particularly felt more connected to the section about motion graphics and brand identity than other parts of this chapter. It just felt more applicable to the type of work that I do, and the real-world implementation of motion graphics. However, this section was REALLY short when I felt it could have an entire chapter dedicated solely to it, and that was a bummer.

Research to inform:

Audio Example:

I wasn’t expecting this video to be as amazing as it was, but it doesn’t miss a beat. The animation syncs with the music in ways I can’t imagine ever doing. Since my video will contain some combination of movement to music, I wanted to find a good example of this, and I couldn’t find anything better than this video.

This is another one I found and loved for its quirky nature and attention to sound design.


Text Example:

When I think of great text animation in a title sequence, I can’t help but think about the opening to ‘Catch Me if You Can’.

The combination of animation and music works perfectly together and the fluid movement of the text guides the viewer’s eyes across the screen in a very deliberate motion. I feel like I could watch this 100 times and always find something new to appreciate about it.

I love this show and equally love the opening credits. Even though it is short, I feel that the text really reflects the tone and visual movement, and complements it without overdoing it. An example of how sometimes, less is more.

Create:

What a rewarding experience to see the finished product after fighting with all the elements that go together to make a video like this. I learned a number of things:

  • Cats make terrible actors, but that anything is possible with treats and toy mice filled with catnip.
  • I should have got a more stable tripod to work on, as it was hard to keep the camera steady when facing towards the floor due to its weight.
  • I feel like no amount of pre-planning really prepares you for getting in there and getting your hands dirty. I expected everything to go smoothly and to just follow my storyboard to the ‘T’ and well, let’s just say that I was happy we had three weeks to make this.
  • Building on that, I was really hard on myself for not being able to get certain elements right the first time. A reminder that in the end, it can always work out.
  • One element I could not get to work was some sort of animated text in the beginning and end credits. And since I left that task to the very last part of the process, I didn’t give myself enough time to get it right.
  • When you make the choice to start filming a project in the evening, you are limiting yourself and your work hours – ESPECIALLY when you have so many damn windows in the background.
  • Also, it was hard to do this in such a common area of the house – try telling a kid that the toys on the rug have to stay RIGHT WHERE THEY ARE for days at a time or insisting that the tripod CAN’T BE MOVED no matter how many times someone almost trips over it. Next time, I’ll use a more dedicated area.
  • I didn’t anticipate the amount of work it would take to slice the video in order to speed up or slow down different sections. I took close to 400 photographs for this piece and uploaded them as one continuous video. I should have thought about creating smaller batches and then placing them back to back in order to eliminate all the chopping I had to do.

Overall, this was an amazing project, and something I would consider doing again if I get the opportunity to but will work in some of the unanticipated hangups into my pre-planning next time.

ORIGINAL STORYBOARD & ANIMATION

Non-Linear Storyboard:

Storyboard_NonLinear

Thoughts: This process was probably the easier of the two because I wasn’t as concerned about following any certain format, and was able to morph my thoughts to fit one of the non-linear styles. Because this story idea would be taking place in a “real world” setting, it meant I really had to look hard at the area in which I would set things up when sketching my storyboards instead of being able to be a bit more creative with my staging.

Why did you choose this story and format? My cat is kind of obsessed with sleeping on the record player as soon as we put an album on. Maybe it’s to music or vibration, but he goes right to sleep. After doing a test animation with clay, I thought it would be fun to utilize some toys in a similar fashion and the cat’s toys seemed like something fun I could tie in.

What challenges might come up? Well, I’m going to have to stage my cat to pull this off, and while my cat is pretty chill, I might have to try this in a number of different ways in order to get it right.

~~~~~~~~~~~~~~~~~~~~~~~~~~~~~~~~~~~~~~~

Linear Storyboard:

Storyboard_Linear

Thoughts: This was a struggle…I am really no good at being forced into a creative headspace. I reviewed some of the earlier chapters of the textbook, and despite the feeling that I was capable, nothing was coming out. I knew I wanted to do something with construction paper cutouts, and we happened to be talking about David Bowie earlier in the day, which led me to an outer space theme and then it all kind of just poured out on to the paper.

Why did you choose this story and format? One of my favorite stop-motion pieces is The History of Typeography because of the paper cutouts, which is why thought it would be neat to employ that here.

What challenges might come up? Cutting up all the pieces and putting it all together may prove to be time-consuming and frustrating.

Are you leaning towards one or the other? I’m leaning towards the non-linear story because I think it will allow me to play a bit more and be more forgiving if/when I hit any roadblocks during the filming.

Original Animation:

I filmed this with my Nikon D7100, because the D810 I have was a bit too heavy for the tripod I was using at the time. Honestly, the entire process was much easier than I thought it would be. I think next time, I’ll use a remote because I noticed some of the camera shake from hitting the shutter button. I was impressed with how smooth the entire piece ended up being because I was afraid that I was moving the clay too much between shots. This exercise gave me a lot of confidence to complete the next module so I’m really looking forward to diving into a longer animation.

INSPIRATIONAL STOP MOTION ANIMATIONS

1:

I really enjoyed this one for its homemade, gritty feel. The animation isn’t always fluid, and the camera has a bit of a shake from frame to frame, but it is pretty amazing despite its imperfections and that I something I’d like to keep in mind while creating my pieces for the next module.

2:

This was a super creative video that I chose because of the amount of planning that must have gone into getting the final product. It has an interesting camera angle and is a good reminder that stop-motion animation isn’t limited to just inanimate objects.

3:

I chose this because I loved the movement and fluidity of the clay. I can’t even begin to hypothesize how some of this motion was created.

4:

I was fascinated by this reoccurring clip on Sesame Street as a child, so I thought I’d include it for purely sentimental reasons. It was interesting to go back and watch some of these so many years later and think about the work it must have been to manipulate the appearance of the cup to complete the scenes.

5:

This is another sentimental one but included for the intricate parts that all needed to be moved to make every part of the frame, particularly the reverberation of the bell that continues while another bell is being rung.

6:

I watched SO MANY of these and could see using Legos in order to get the hang ofstop-motion n animation. Legos seem like a forgiving medium to work with since they are so easily stabilized by being interlocked. Also, there really isn’t any way to achieve smooth fluidity with such stiff working parts.

7:

OK Go have some of the most creative music videos I have ever seen. I looked them up and came across this video that was done for Sesame Street which I hadn’t seen before. Another example of how people can be used in stop motion. I’m also pretty interested in incorporating post-it notes into an animation since they are pretty versatile, as seen below.

Colors

CHAPTERS 4 & 5

Chapter Four discusses some basic color terminology such as hue, saturation, and value, but also goes further in discussing the importance color plays in composition. Personally, this chapter was a light read for me, having experience in color theory through a number of other design courses and also, in my own photography. I get a bit of a thrill when reviewing photos of my own and being able to find color compositions that work well together. Often, these pictures aren’t even taken at the same place or in the same year but manage to complement each other and work well side-by-side in a portfolio which speaks to the power of color when it comes to mood. When working on a digital design project, I often find myself relying on Adobe’s color tool (found here) to create palettes that complement whatever project I happen to be working on at the time.  I find it helpful because sometimes, this tool presents a combination I wouldn’t have considered on my own.

It also reminded me of a video I had come across within the last year or so that I bookmarked, which used clips from Pixar movies and tied the clips by their use of color. After revisiting the video again, it pretty amazing to think of all the work that goes into getting the color just right in order to convey a feeling or mood in their animation. I’ve added the video here if anyone is interested:

ROYGBIV: A Pixar Supercut from Rishi Kaneria on Vimeo.

Chapter Five, ‘Weird Science’ was more about experimentation and the idea that, without experimenting you ultimately end up limiting yourself in your creative endeavors. The two sections of this chapter that will likely stick with me is the notion of making “bad art”  and the idea of “failing better”. I tend to struggle will the thought of making bad art which is inevitably tied to my tendency to strive for perfection and my impatient nature. I think that this course (in a general sense) is helping me break that within myself because I have little to no experience in the area of motion design. I have no choice but to experiment in order to try to achieve the results I am after. I enjoyed the reference to the Samuel Beckett quote because my husband frequently likes to remind me of the “fail better” mantra when I’m grumbling that something I was working on isn’t yielding the result I thought it would. I’m going to try to really practice the messages of this chapter when it comes to my animations because I know it will ultimately be a practice that I can apply to other artistic projects as soon as become comfortable with it.

CASCADESFinal2

ORIGINAL CINAMAGRAPHS

Whelp. This assignment was far more challenging than I was expecting, but all in all, I’m pleased with the way that these all came out. Here are my original cinamagrapghs:

After Effects:

CASCADESFinal2

Overall, I’m happy with the way this turned out. There are cascades that run near to my house, and I narrowed in on a small area that I really liked. Following the After Effects tutorial, I managed to get a clean loop of my video. My only slight annoyance is that the reverse-time layer looks really noticeable to me. I tried to manipulate my file so that it looked like the water only flows in the one direction that it is meant to, but I couldn’t get it to do so without a hard skip at the end. I desaturated the pre-comp and added some brown tones to it.

Photoshop:

xSteam

I had a lot of trouble with this file – not necessarily getting it to work in Photoshop, but getting it to loop in my browser. This was one of FOUR different stove scenes that I recorded, but no matter what I tried, it just wouldn’t loop. Thankfully, Christopher (from this class) pointed out a way to manipulate the frame rate in Photoshop and I was able to get it to work.

I did some slight editing – converted it B&W and then erased the portion of B&W layer to expose the red elements in the frame. I wish I didn’t have to adjust the quality as much as I had to in order to export it because I feel like the kettle is too pixelated. The full-sized image looks pretty great.

After Effects:

HANOVER

I went back to After Effects for my final one because I don’t have a lot of experience with this program, and figured it would be good practice. So, if it isn’t immediately noticeable, the only motion in this cinematograph takes place in the windows of the theatre. I recorded this scene specifically for the movement of the flag in the wind, but again, I had trouble getting it to loop because it is so large. I’m going to post it here anyway cause I think it looks pretty cool (just give it some time to re-load the loop):

HanoverTWOagain

I’m glad I was able to make this clip work out anyway, because I was shooting from a parking garage, and didn’t really want to pay in order to shoot it again. I wish you could see more lights from the passing cars in the windows, but it was a pretty slow traffic night on this particular evening. I do really enjoy that I can’t detect where the loop starts and ends when watching it like I can with my first one.

I shot a total of 12 different scenes/clips just to come up with these three using a tripod and my Nikon D810. This was a challenging assignment, but I can see myself doing more of these in the future now that I have a handle on the process.

2-cinemagraph-photography-inspiration

CINAMAGRAPHS FOR INSPIRATION

2-cinemagraph-photography-inspiration+

This might be my favorite out of the group. I really love the way the light flickers as the reel-to-reel rotates. I feel like this image wouldn’t be as exciting without it.

5658550961_6976fa5188_o

This one wasn’t particularly stunning to me, but I really like how the colors worked together here between the bike and the surrounding greenery.

5659132580_758465b331_o

I really liked how this one was framed, and how your brain is anticipating all of this chaos and energy in the park, but you only get this very calm and relaxed person reading a paper.

5733843611_c354ae62fe_o

I chose this because as soon as I saw it, it reminded me of my cat. In fact, I recorded a clip of my cat to try to emulate this particular cinamagraph. However, cats aren’t very good at taking directions like “sit still”. I tried taking the footage of my cat blinking to create a GIF, and basically, his face looks like it is floating away from his body. Suffice it to say, I didn’t use that as one of my final images.

1502468781862

I chose this one cause the composition and lighting are absolutely stunning. At first glance, it almost looks like it could be an oil painting. Then, you see the flies and it’s kinda gross in contrast to this beautiful bowl of fruit.

schwingsetcropped

Much like this city-scape above, this one appeals to me because of the implied motion that my brain is expecting.

sydKo

I was drawn to this because the color is beautiful, and I loved how all of the motion is contained in such a tiny portion of the image.

tumblr_li9eftM9GH1qzcq51o1_5001

I was keen on this one because I felt I could easily replicate in a similar fashion.

tumblr_my6e6v70c21r4zr2vo2_r2_500

I was drawn to this one purely for the fog on the water and the amount of contrast in the shadows.


tumblr_ny4e1h2B9k1s85u2fo1_1280

This one is all about the motion for me – I love the way your eye follows that perfect figure-eight motion around the screen.

IMG_9116.JPG

CHAPTERS 2 & 3

IMG_9116.JPG

If there is one thing that I struggle with, it is organizing my ideas. Many of my creative endeavors tend to be off-the-cuff and incomplete because revisions are time-consuming and honestly, boring. I like instant results, but much of chapters 3&4 dealt with the aspects of storytelling and planning, so there was much for me to learn here.

Chapter Two dove into linear and non-linear storytelling. Linear consists of the basic three-part arch – the introduction of a problem, the path towards a solution, and finally, the solution itself. However, non-linear is a more creative track that may center around a  thought, or memory, or sound. When thinking about the linear story-telling method, I immediately thought of a number of Pixar shorts that came to mind – notably, Paperman which is able to tell a beautifully crafted love story in under seven minutes. I tried to think of a non-linear piece of work that had stuck with me in the way Paperman did, I honestly, couldn’t come up with one easily. I did, however, look up and watch the examples the book gave, Passer Passer, and really enjoyed how the animation compliments the montage of sounds, and how the piece is far more like a work of art that is meant to be enjoyed “as-is”, rather than placing an expectation on the viewer to try to “get it” at the end.

Chapter Three discussed the storyboarding process and broke the steps from thumbnailing, all the way to adding sound and timing to create an animatic, to make sure that your story idea is actually working as it is intended. The process of creating an animatic is what appealed to me the most in this chapter because I really like the idea of putting it all together and having something to show for all the work, even if it doesn’t result in a completed piece of work. I can also recognize that this is my impatience speaking…

I took a peek at the next chapter and am psyched that it has much to do with color! Looking forward to what is in store in the coming pages.